The greatest Photoshop Command
Dec 6, 2023 - 3 min read
During high school, my interest in graphic design began. If you want to know how I started in design and the story of my first job, you can click here.
During classes and in my free time, I spent time researching new ways to do things in Photoshop and new tricks. I remember one time when I wanted to create a poster that involved perspective and rotated pieces. The poster was for an event at my school, which was a competition to build a bridge using spaghetti pasta sticks. The bridge that could support the most weight would win.
I remember my teacher asked me if I could help create the poster. I said yes and got to work. Everything was going great until I encountered the perspectives. I wanted to do something more advanced, but the knowledge I had wasn't enough to achieve it. So, I decided to go to the person who is still one of the most knowledgeable people about Photoshop that I know, Professor Pedro. I gave him a personalized poster as a gift. If you want to know more about the story, you can click here.
I remember I went to his office and talked to him about the problem I was having. I couldn't transform the drawings I had to my liking. That's when Pedro showed me one of the most powerful commands I have ever known in Photoshop, and one that I still use the most in all my work.

The command is Command + T on Mac and Ctrl + T on Windows. I remember when he showed me that command, I was amazed. He had shown me a tool that allowed me to transform an image with different points that I could modify as I pleased to get the result I wanted. Later on, I learned more advanced commands that I will talk about in other posts, but the fact is that this was the first command that showed me the power of Photoshop.
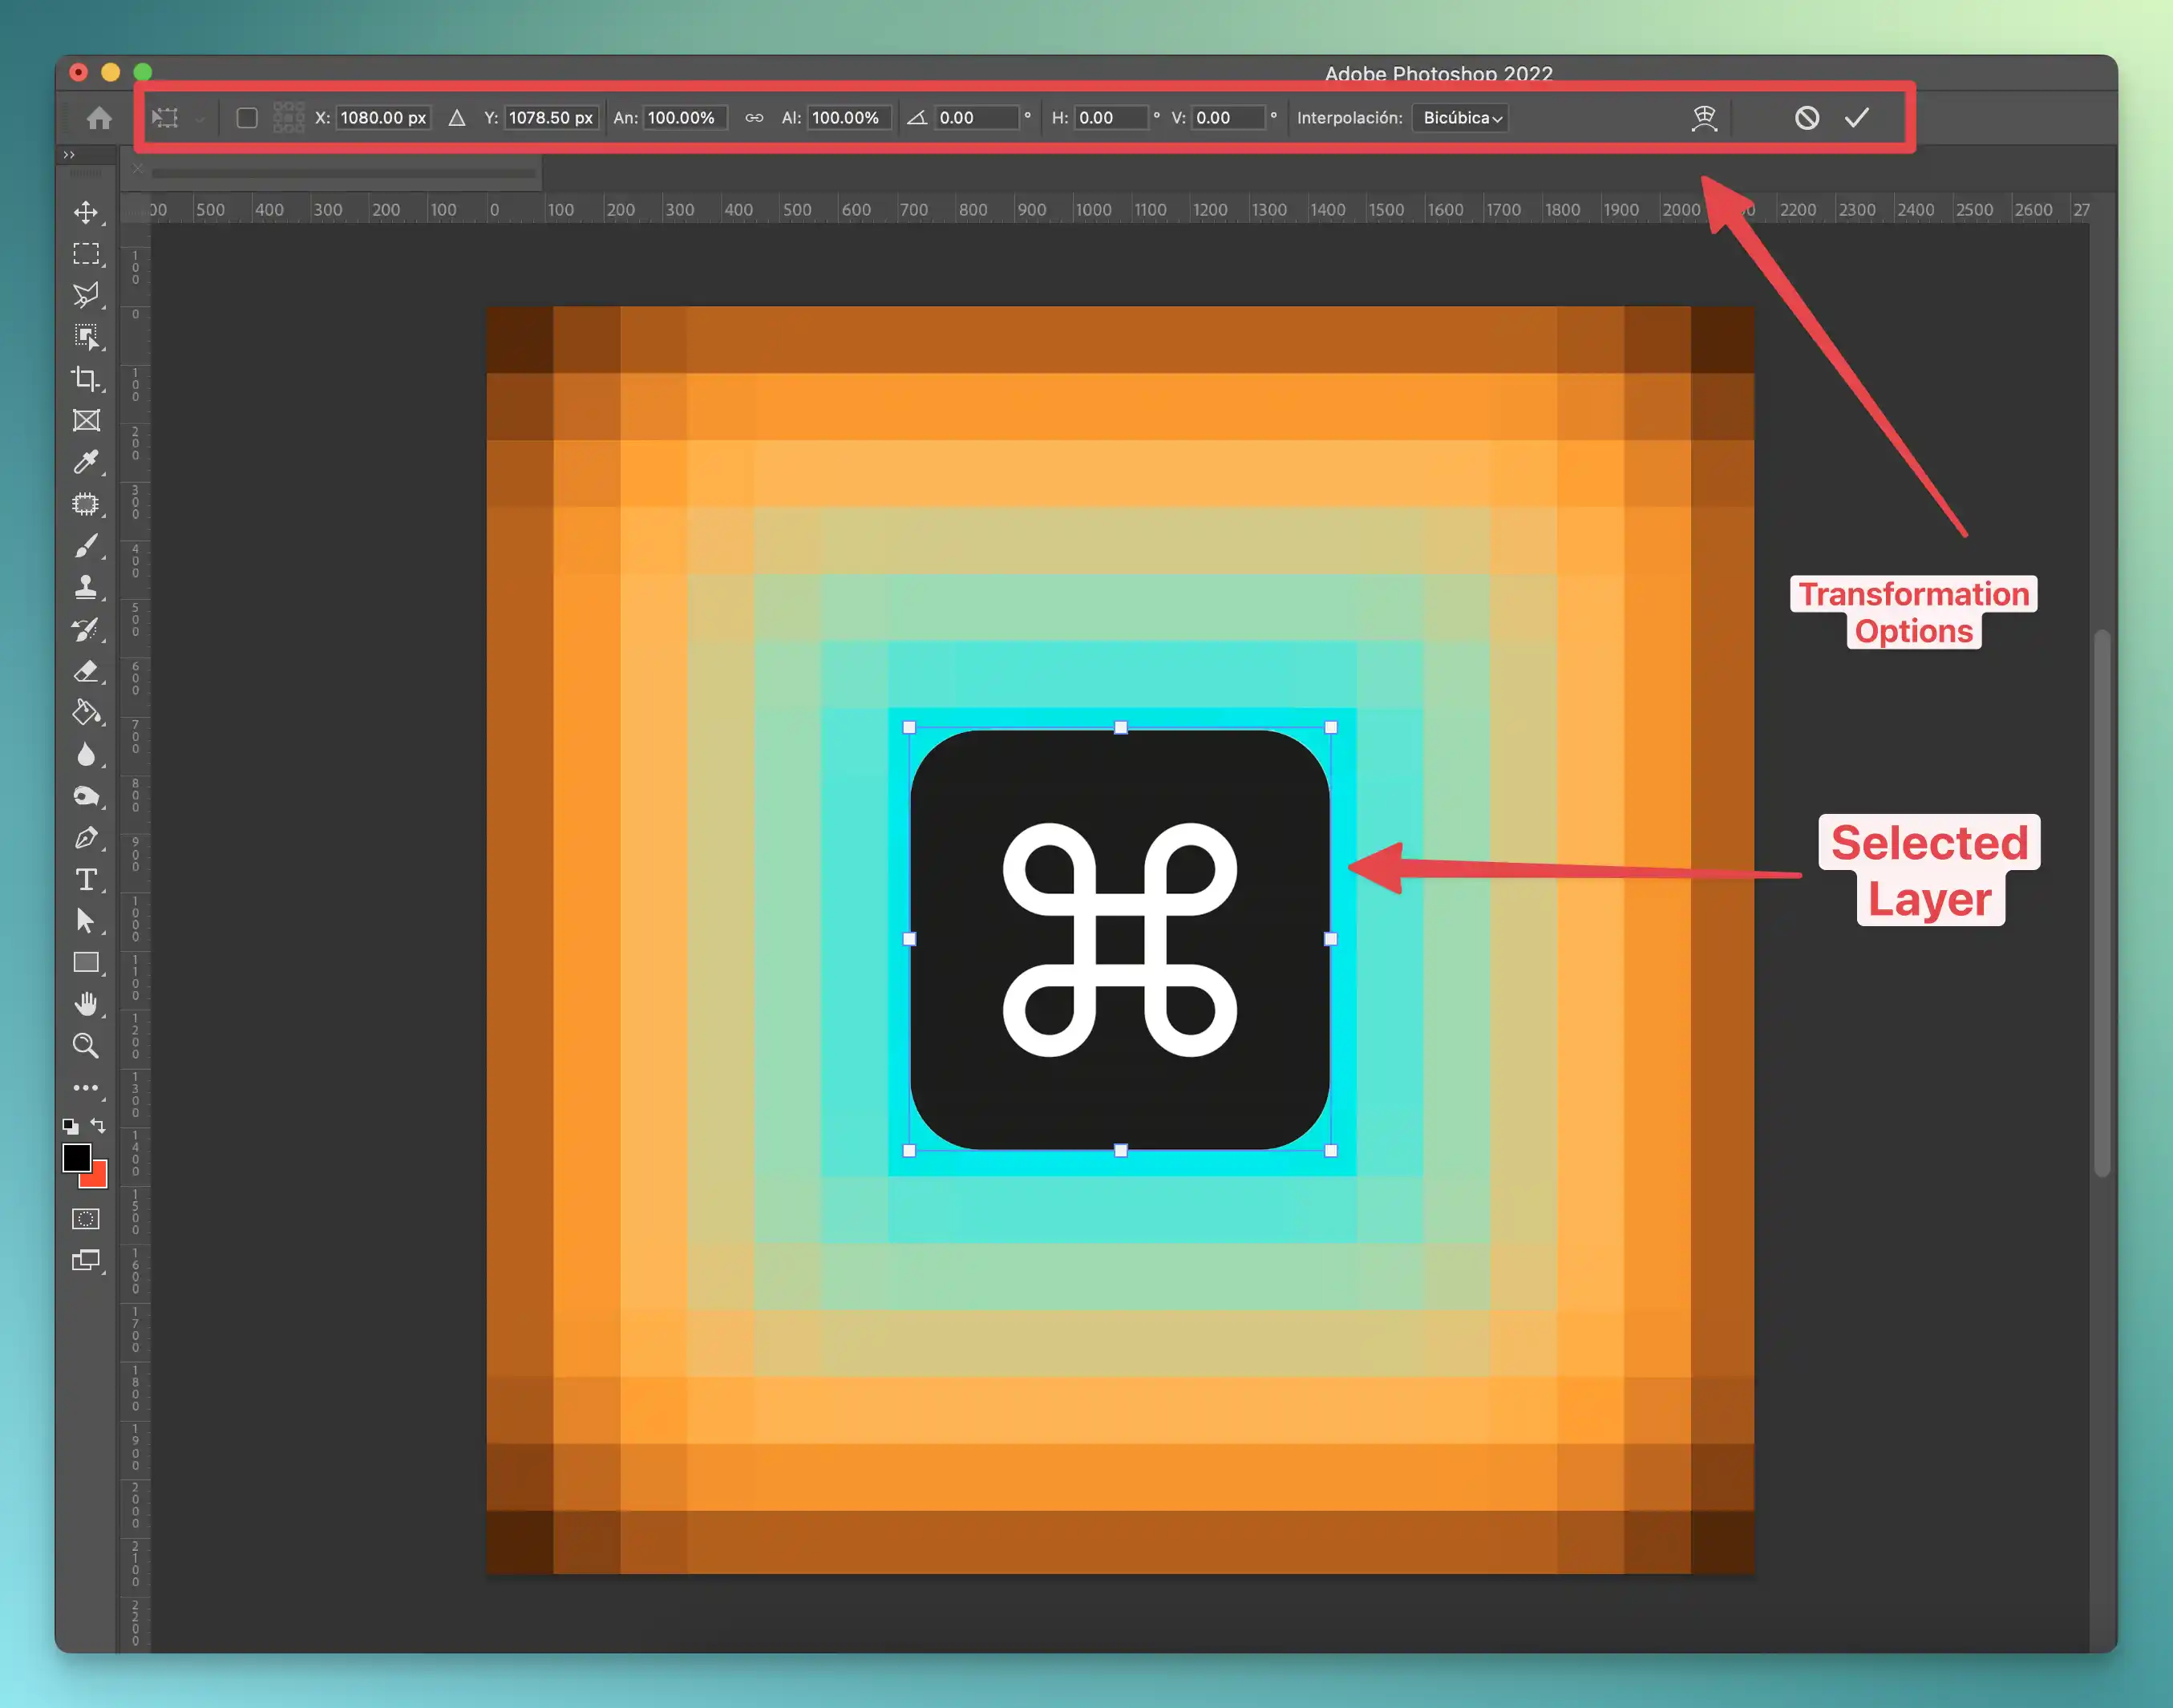
My friend Angel accompanied me that time to ask Pedro the question, and when he showed us that command, we started making jokes about how Command + T was more powerful than Command C + Command V. But getting specific with the command, when you select a layer and use the command, new options will appear in the top bar of Photoshop.

You can uniformly resize the object by simply selecting one of its points and pressing Shift while expanding it. The detail is that if you press Command or Ctrl, the mouse icon will change, and now if you select one of the layer's points, you can move that point as you please.

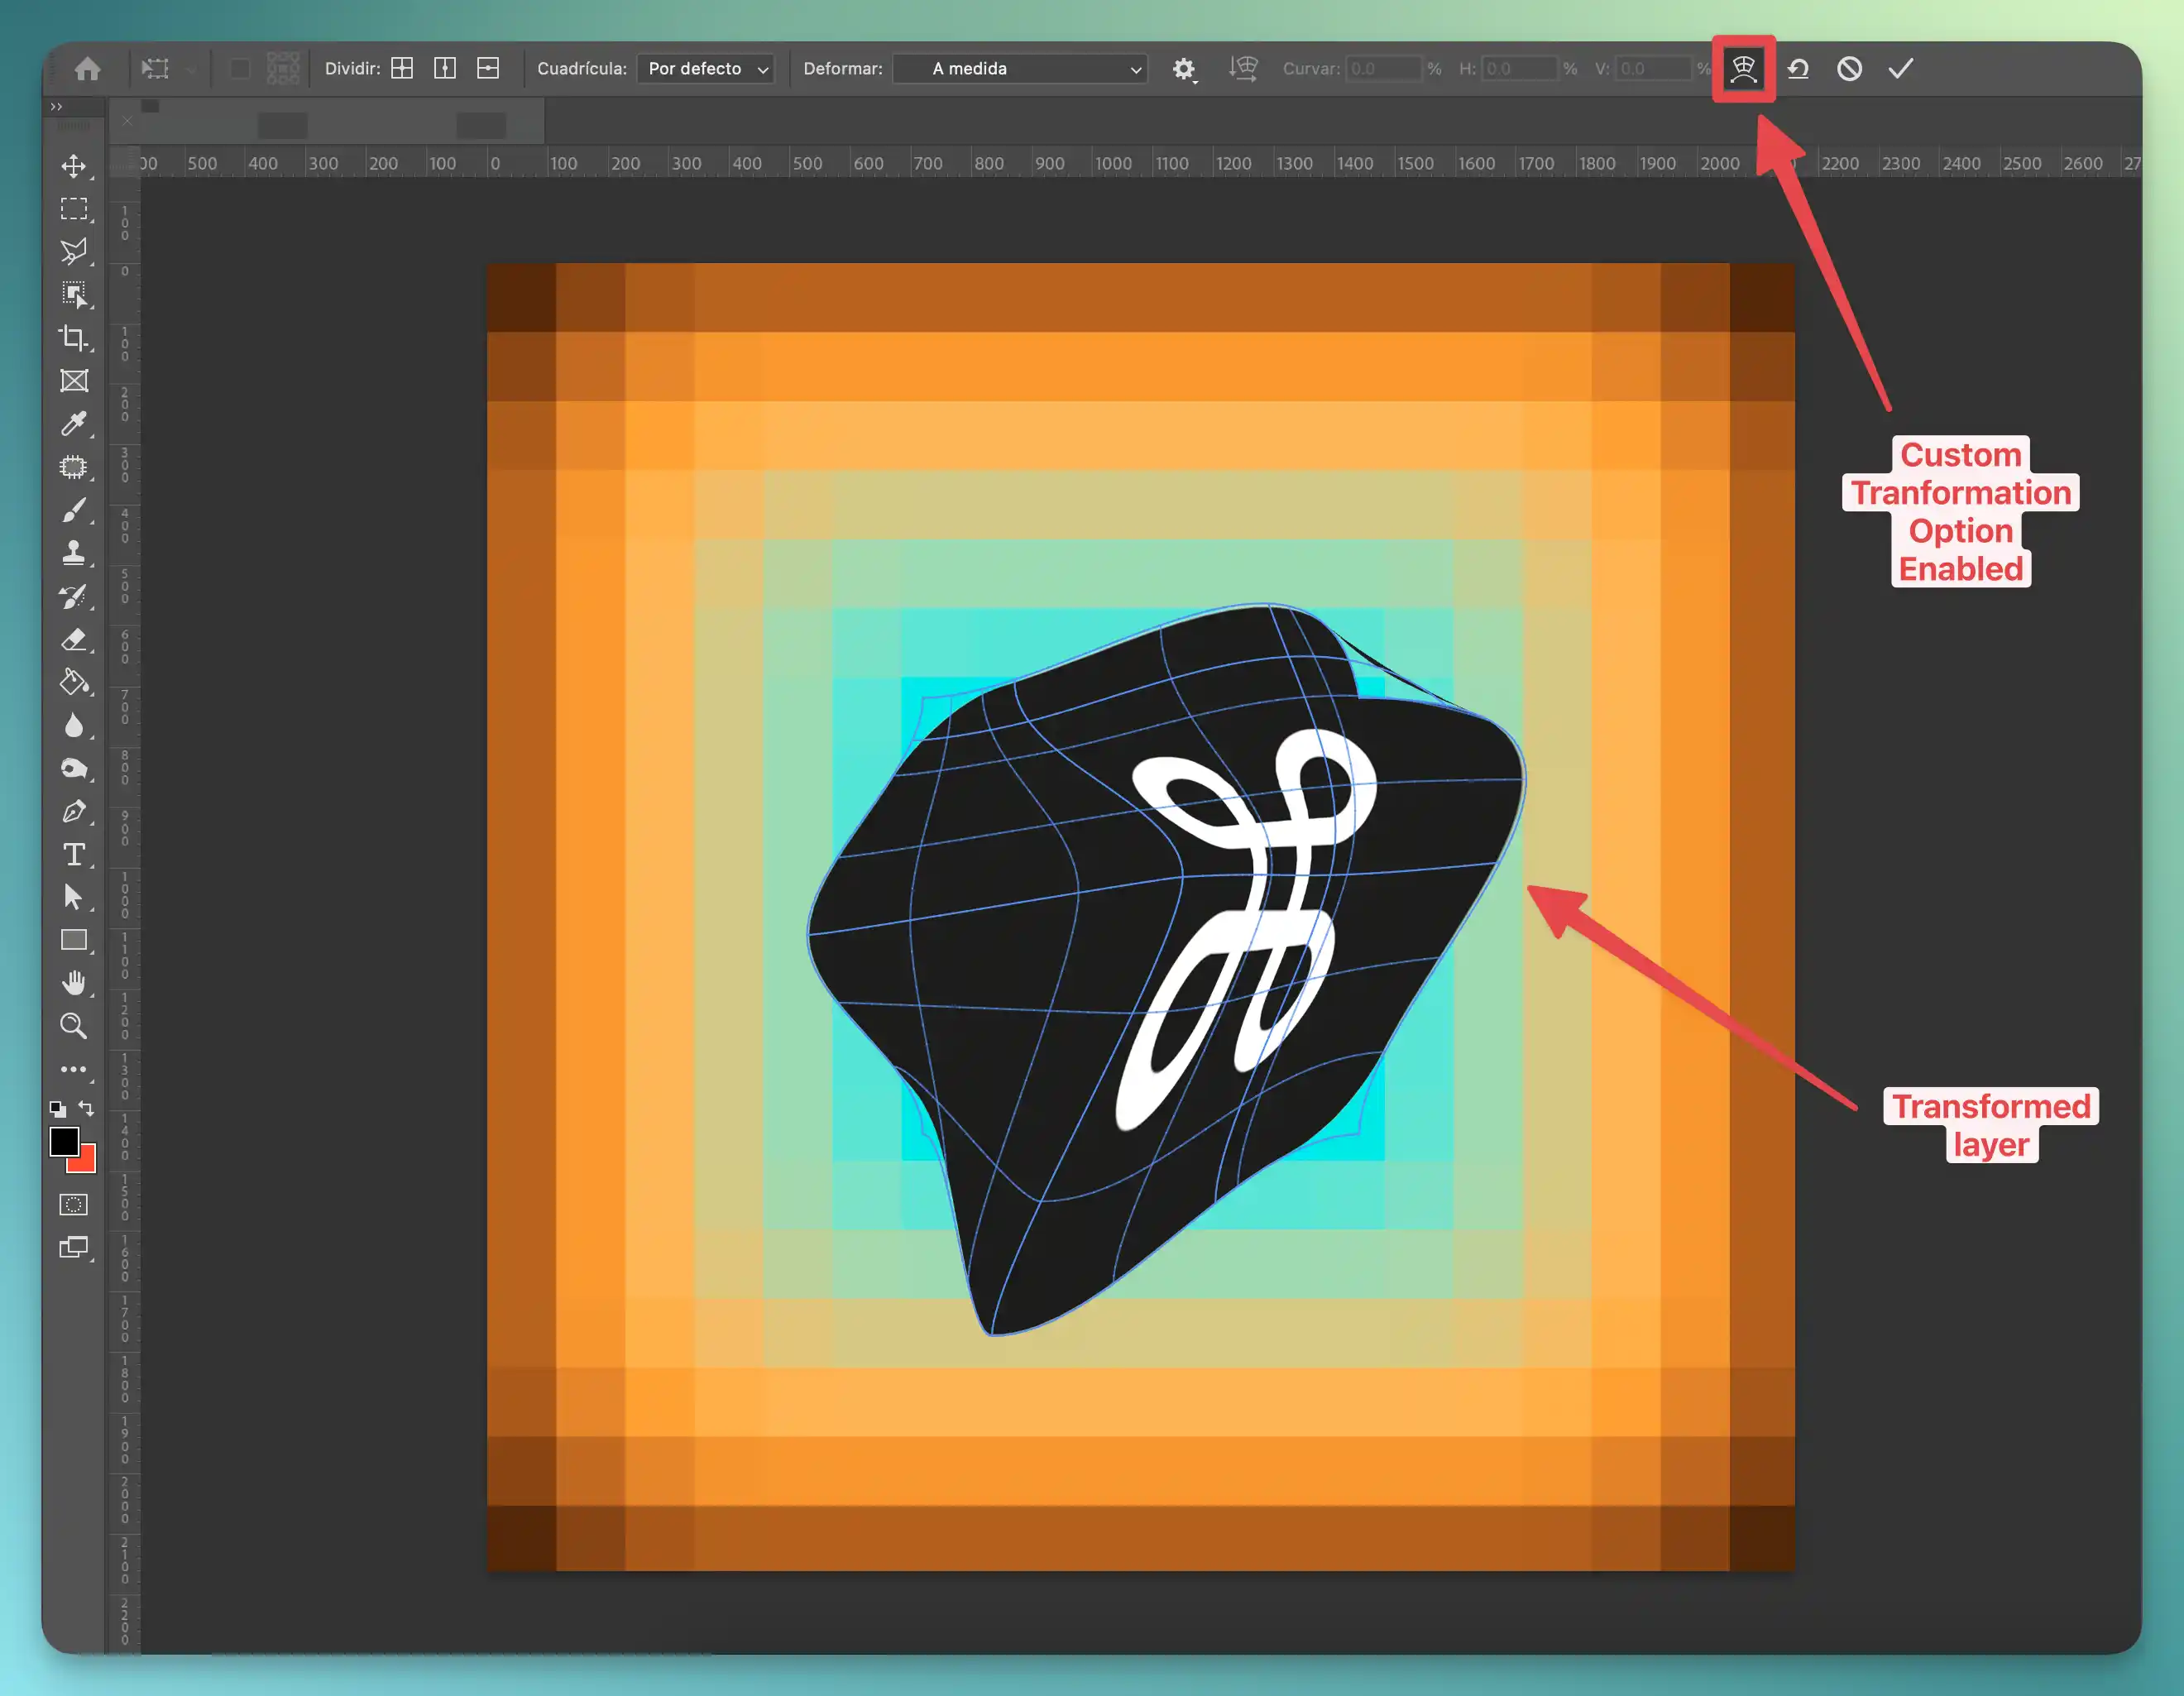
Another very useful function of this tool appears when we click on an icon in the options bar. This option will not only allow us to modify the points of the layer but also add curvatures between the points, and even add points within the layer to make more complex modifications.
I have used this command countless times, and it is still part of my workflow. I hope it helps you in your future projects.
I hope you really liked this post. Thank you very much for reading :)